Crestron Home
Installing the driver using the Crestron Home Setup App the driver can be found at :
Drivers -> Security System -> Ajax
We have two other legacy Ajax extension drivers called Ajax Alarm and Ajax Power if you are looking to install these then look at the legacy documentation at Support Central.
Ajax now requires two-factor authentication (2FA) on every account, so from driver version 2.7.0 the Ajax password is no longer entered in the driver settings. Instead you sign in once from a setup link with your email, password and a 6-digit 2FA code, and the driver keeps a secure, self-renewing token — your password is never stored.
Existing systems on 2.5 or earlier must update to 2.7.0 to keep their Ajax connection working once 2FA is enforced on the account.
Installing this solution is a multi-step process.
Step one — driver settings
Add the driver to a room. On the initial settings page enter the details you noted 🗒️✏️ during your Ajax system configuration:
- Licence key — obtained from store.lcd.network (this is now the first setup step)
- Hub ID
Scroll down to verify the PIN codes used for arming and disarming. The SIA port can also be set here; it defaults to 53002.
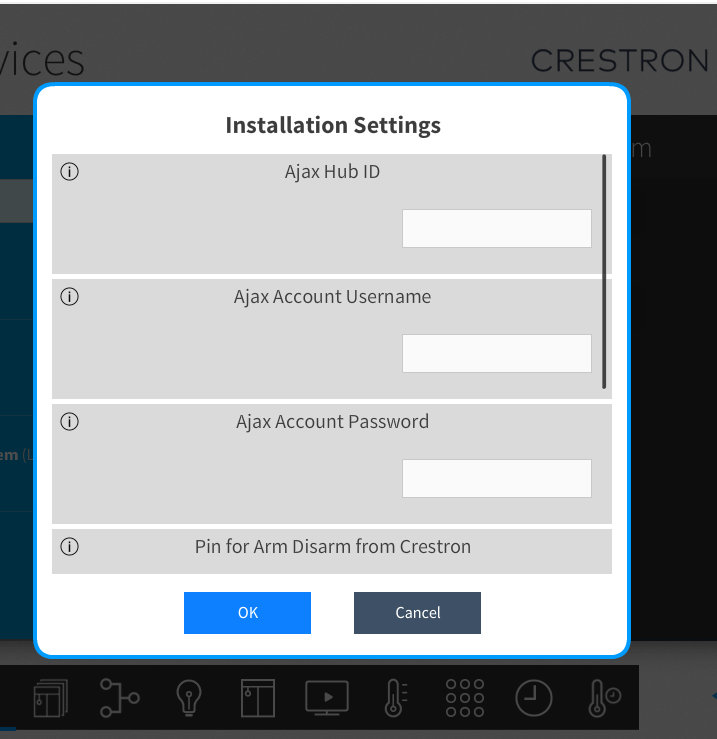
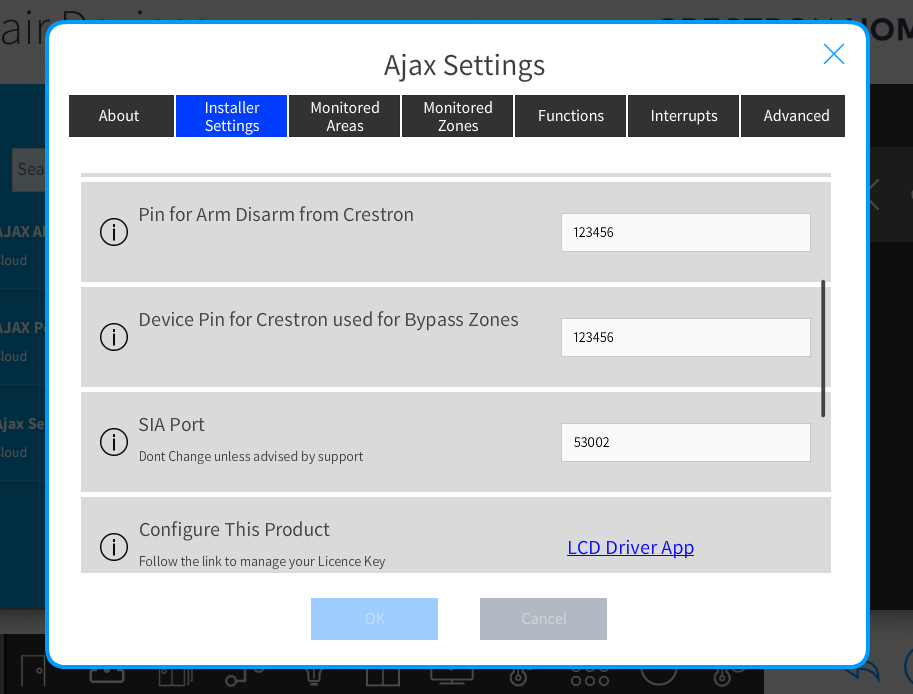
Press OK to continue.
Step two — sign in to Ajax
Open the Sign in to Ajax link shown in the driver's setup steps. On the sign-in page enter your Ajax:
- Password
- 6-digit 2FA code from your authenticator app
Sign in once. The driver exchanges these for a long-lived, rotating token and never stores your password. It stays signed in on its own across reboots, and only asks you to sign in again if the token is revoked.
This is a one-time step per system. If the driver ever reports Not signed in, re-open this link and sign in again.
On a successful sign-in the driver connects to the Ajax cloud, and the Groups set up in your Ajax system appear as Areas on the Home page of your Crestron Home system. You'll also see Monitored Areas and Monitored Zones in the Alarm Setup tabs of the driver settings.
The alarm driver is not visible in the room it's installed into.
If you don't see any alarm areas, the installation didn't complete. Re-open the driver settings, open the LCD Driver App → Diagnostics, and run the Connection Troubleshooter — it checks the Hub, the SIA listener and the Ajax cloud sign-in and tells you which one failed.
Crestron Home SIA ID Setup
For proper status updates, complete device ID configuration during commissioning.
The device id can be found using the Ajax Mobile app See the image below.
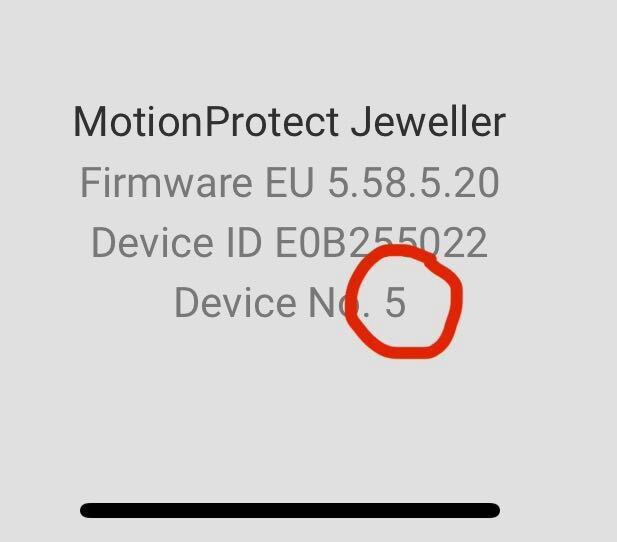
This step allows the driver to identify the Device from its device number (Used in SIA) to the device ID (used in the Ajax API)
Once you have a list of all the device numbers for your devices you can use them below
Option 1: Name Devices Temporarily
- In the Ajax App, add
{Device No}to each device name - Load the driver → it reads and stores Device No
- Once setup is complete, you can remove
{Device No}from the names
Example: Water → Water {1}
Option 2: Manually Edit Config File
- Download config from Crestron processor
- Add missing Device No entries to the DeviceSiaId Field
- No other Entries should be changed.
- Re-upload file
- Reboot system
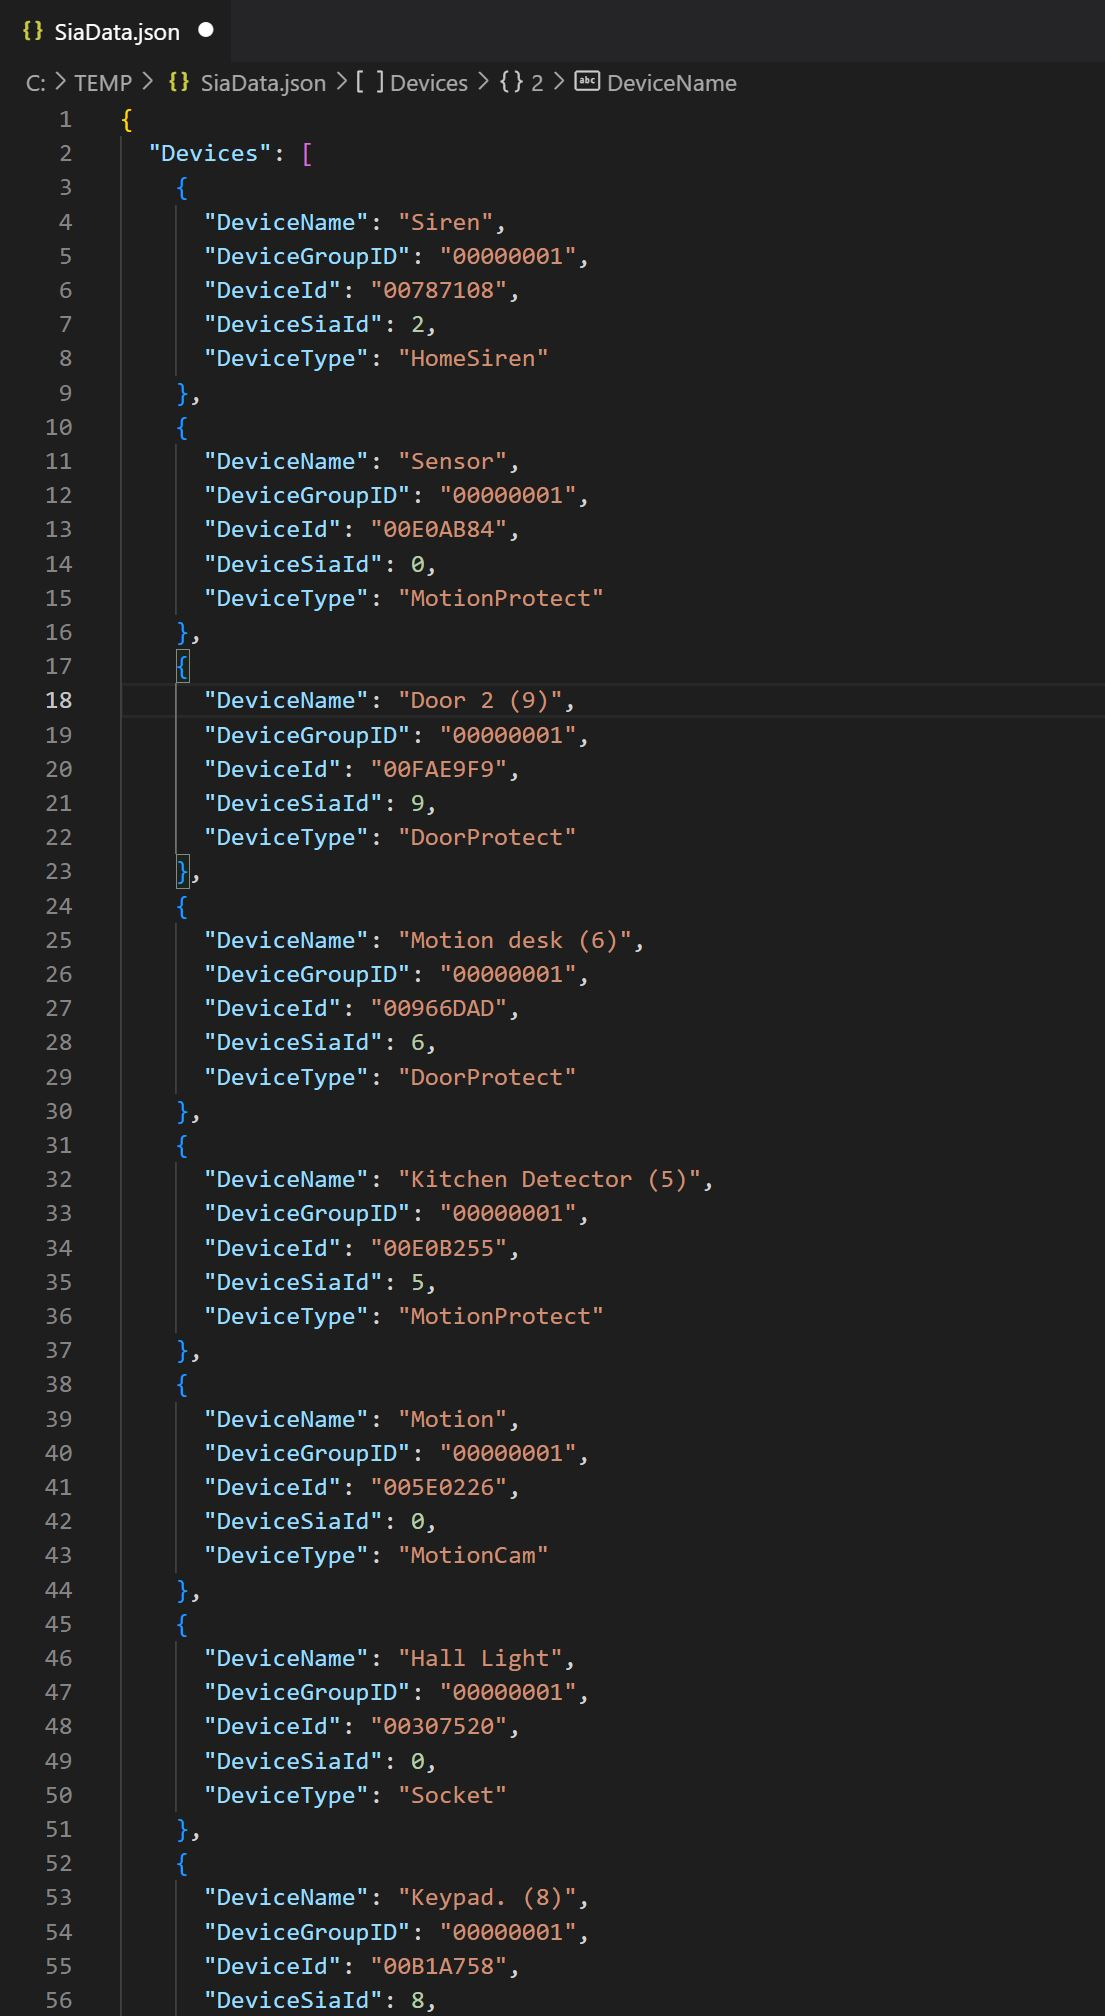
Config File Location:
/user/Data/ThirdParty/LCD/LCDCHOMEAJAXSECURITY/Configs/SiaData.json
Reboot Required
- Reboot required:
- After adding/modifying groups/devices
- After changing settings
Device Setup
- Ajax Devices appear as Zones in Crestron
- Report: Faulted, Tampered, Missing, OK, Low Battery
- All zones default to OK on first setup; previous fault states will not display until cleared
Zone Limitations
By Default, devices such as MotionProtect, DoorProtect do not report alarm events to the CMS unless the system is in an ARMED state. If you want these devices to always report state changes, it needs to be set to "Always Active" and "Instant Alarm" which makes the device always armed. More info here
Turning off Alarm notifications in the Ajax App (Optional)
This is so devices don't activate the alarm notification (If you choose to set any Devices to Always Active) You can turn off Alarm notifications by going to Hub >> Settings >> Users >> Select the User >> Notification settings >> Turn off Alarms. More info on notifications here
Turning off Siren Alerts (Optional)
This is so devices set to "Always Active" does not trigger any Sirens. NOTE If the device is a critical security device and the Siren needs to sound when in Alarm, do not turn this off.
Supported Zone Devices
GlassProtect LeakProtect MotionProtect DualCurtain MotionCam CombiProtect FireProtect DoorProtect
Always Active Devices
- These devices trigger on all activations
- You can choose to disable siren on activations in Ajax
- Note: May cause alarms even during entry/exit delays
Zone types in Crestron Home
Each zone takes its type from the Ajax device it was built from. The driver matches on the family name, so
newer variants (DoorProtectFibra, MotionCamOutdoorPhod, GlassProtectS) map without a driver update.
| Ajax device | Crestron zone type |
|---|---|
| GlassProtect (glass break) | Window |
| DoorProtect (opening detector) | Contact |
| MotionProtect, MotionCam, curtain detectors, CombiProtect | Motion |
| FireProtect, LeaksProtect, panic buttons, keypads, sirens, SpaceControl, transmitters, range extenders, sockets, wall switches, relays, bridges | Other |
| Anything unrecognised | Unknown |
Opening detectors map to Contact, not Door: Ajax doesn't say whether a detector is fitted to a door or a window, so the driver uses Crestron's generic type instead of guessing. Everything in the Other row is a real device — Crestron Home simply has no zone type for it, as it offers only Door, Window, Motion, Contact, Other and Unknown.
Alarm Type Table
| Alarm Type | Trigger | Area Arm State |
|---|---|---|
| Medical Alarm | Ajax Panic button | Any Arm State including disarm |
| Fire Alarm | Fire Sensor faulted | Any Arm State including disarm |
| Alarm | 1 or more zone faulted | Area Armed |
| Burglary Alarm | 1 or more zone faulted | Any Arm State including disarm |
Clearing Alarms
| Alarm Type | Automatic Disarm | Manual Disarm |
|---|---|---|
| Medical Alarm | n/a | Arm / Disarm System |
| Fire Alarm | n/a | Arm / Disarm System |
| Alarm (Area) | Zone Returns to Normal and 0 faulted zones in area | Arm / Disarm System |
| Burglary Alarm (Area) | Zone Returns to Normal and 0 faulted zones in area | Arm / Disarm System |
| Alarm (Hub/System) | Zone Returns to Normal and 0 faulted zones in system | Arm / Disarm System |
System (hub) state and alarms
As well as each area, Crestron Home shows one arm state and one set of alarms for the whole Ajax system. This is what integrations using the Crestron Home Web API see. From driver 2.7.5:
| What the system shows | |
|---|---|
| Armed Away | At least one area is armed, away or stay. A partly armed system shows as armed. |
| Disarmed | Every area is disarmed. |
| Fire alarm | A fire sensor is in alarm. |
| Alarm | An area alarm, a panic button or a water leak. |
Arm state reaches the driver only over SIA. The Ajax cloud connection gives the driver its areas and zones, but never whether they're armed. Until you've set up Hub Settings → Monitoring Station as above, areas and zones appear correctly but the system state stays Unknown, however often you arm.
The system reports only Fire and Alarm, because Crestron Home can't report other alarm types for the whole system. A panic button or a leak still raises an alarm, shown as Alarm. Areas aren't affected and keep their own alarm types, including Medical and Burglary.
Glossary
| Ajax Term | Crestron Term |
|---|---|
| Device | Zone |
| Group | Area |
Usage
The Crestron Home Security Driver provides a Home Page Tile which has a fixed icon set which cannot be changed